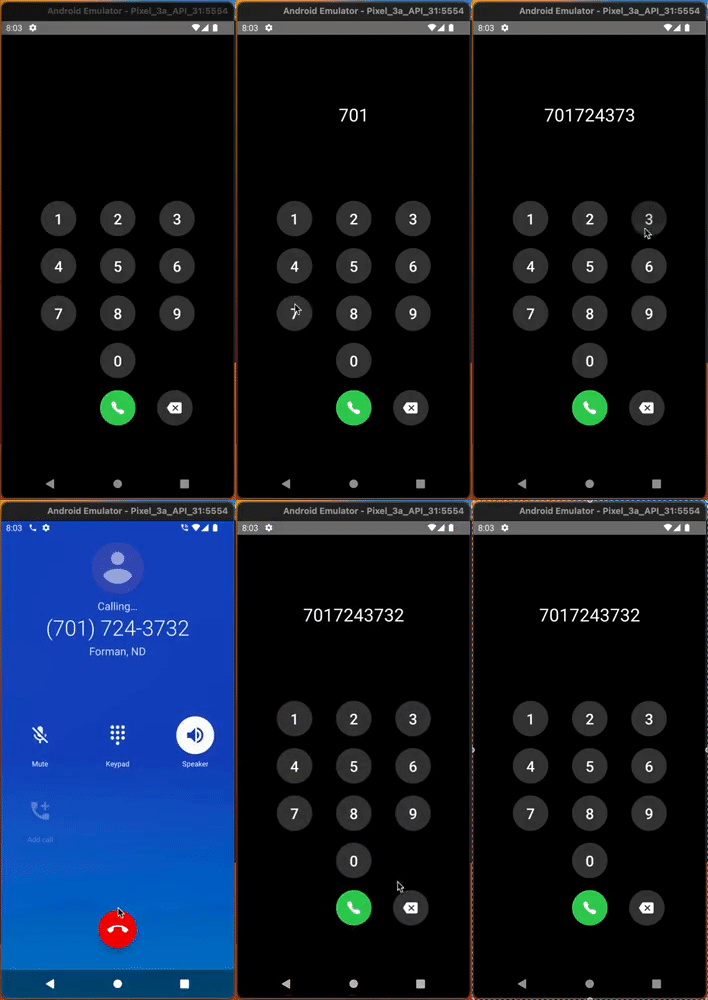
React Native is a powerful framework for building mobile applications using JavaScript and React. While React Native provides a rich set of components and APIs, there may be situations where you need to access platform-specific functionality that is not available out of the box. In this blog, we will explore how to create a native module for Android to implement native calling functionality in a React Native application. We will dive into the various parts of the native code required for this integration.
Prerequisites
Before we begin, make sure you have the following prerequisites in place:
-
React Native Development Environment: Set up a working React Native development environment on your machine.
-
Android Studio: Install Android Studio to build and run Android applications.
-
Basic knowledge of Java and React Native.
 (Demo)
Creating the Native Module
To create a native module, we need to perform the following steps:
I recommend using Android Studio to write your native code. Android studio is an IDE built for Android development and using it will help you resolve minor issues like code syntax errors quickly.
1. Initialize the Native Module
Start by creating a new package to hold our native module. In the Android project, navigate to the java directory and create a new package, e.g., com.yourappname.callingModule.
 (Creating Calling Module Package)
2. Create the Native Module
Inside the newly created package, create a new Java class, e.g., CallingModule.java. This class will extend the ReactContextBaseJavaModule class and implement the necessary methods.
getName(): Override this method to provide the name of your module, which will be used in JavaScript to access the module.
package com.yourappname.callingModule;

import com.facebook.react.bridge.NativeModule;
import com.facebook.react.bridge.ReactApplicationContext;
import com.facebook.react.bridge.ReactContext;
import com.facebook.react.bridge.ReactContextBaseJavaModule;
import com.facebook.react.bridge.ReactMethod;

import java.util.Map;
import java.util.HashMap;

import android.content.Context;
import android.os.Build;
import android.os.Bundle;

public class CallingModule extends ReactContextBaseJavaModule {

    CallingModule(ReactApplicationContext context) {
        super(context);
    }

    @Override
    public String getName() {
        return "CallingModule";
    }

}
3. Implement the Native Calling Logic
Within the CallingModule create makeCall method, define the logic to handle the native calling functionality. This can include making native API calls, handling permissions, and implementing any necessary callbacks or event listeners. Remember this is the method we will be invoking from javascript, it must be annotated with @ReactMethod .
- To implement the calling functionality we will be using Android’s Telecom Manager to initiate a phone call using
placeCallmethod. Remember to handle the necessary permissions and request them if required.
@ReactMethod
public void makeCall(String phoneNumber) {
ReactApplicationContext ctx = getReactApplicationContext();
TelecomManager tm = (TelecomManager) ctx.getSystemService(Context.TELECOM_SERVICE);

        Uri uri = Uri.fromParts("tel", phoneNumber, null);
        Bundle extras = new Bundle();
        extras.putBoolean(TelecomManager.EXTRA_START_CALL_WITH_SPEAKERPHONE, true);
        if (ActivityCompat.checkSelfPermission(ctx, Manifest.permission.CALL_PHONE) != PackageManager.PERMISSION_GRANTED) {
            return;
        }
        if (Build.VERSION.SDK_INT >= Build.VERSION_CODES.M) {
            tm.placeCall(uri, extras);
        }
    }
Placing a call requires CALL_PHONE permission. Add permission in your App’s AndroidManifest.xml
  <manifest xmlns:android="http://schemas.android.com/apk/res/android">
    <uses-permission android:name="android.permission.INTERNET" />

    //Add call phone permission here
    <uses-permission android:name="android.permission.CALL_PHONE"/>


    <application>
    ...
    ...
    ...
    </application>

  </manifest>
Check out Telecom Manager’s documentation to implement other native features like end call, add another incoming call, etc.
4. Register the Native Module
To add your Native Module to ReactPackage , we will create a new Java/Kotlin Class named (CallingPackage.java or CallingPackage.kt) that implements ReactPackage inside the android/app/src/main/java/com/your-app-name/callingModule folder (as demonstrated in the first step):
package com.rncallingapp.callingModule;
import com.facebook.react.ReactPackage;
import com.facebook.react.bridge.NativeModule;
import com.facebook.react.bridge.ReactApplicationContext;
import com.facebook.react.uimanager.ViewManager;

import java.util.ArrayList;
import java.util.Collections;
import java.util.List;

public class CallingPackage implements ReactPackage {

@Override
public List<ViewManager> createViewManagers(ReactApplicationContext reactContext) {
return Collections.emptyList();
}

@Override
public List<NativeModule> createNativeModules(
ReactApplicationContext reactContext) {
List<NativeModule> modules = new ArrayList<>();

       //Add your module here
       modules.add(new CallingModule(reactContext));

       return modules;

}

}
This file imports the native module you created, CallingModule. It then instantiates CallingModule within the createNativeModules() function and returns it as a list of NativeModules to register. If you add more native modules down the line, you can also instantiate them and add them to the list returned here.
To register the CallingModule package, you must add CallingPackage to the list of packages returned in ReactNativeHost's getPackages() method. Open the MainApplication.java file located in the same package as your native module. Import your CallingModule package and add it to the list of native modules in the getPackages() method.
//Other imports

import com.yourappname.callingModule.CallingPackage;
//import your package

    protected List<ReactPackage> getPackages() {
          @SuppressWarnings("UnnecessaryLocalVariable")
          List<ReactPackage> packages = new PackageList(this).getPackages();
          //Register your calling package here
          packages.add(new CallingPackage());
          return packages;
        }
5. Accessing the Native Module from JavaScript
Now that the native module is set up, you can access it from your React Native JavaScript code. Import the NativeModules object and use the name defined in the getName() method to access the module's methods.
import { NativeModules } from 'react-native';

const { CallingModule } = NativeModules;

CallingModule.makeCall(number);
Note: makeCall method might not work directly make sure to request necessary permission using react-native’s PermissionAndroid API. Please refer the complete code to checkout the implementation.
For complete code, visit the repository https://github.com/callmemonky/RNCallingApp.
Check out react-native’s documentation on native modules https://reactnative.dev/docs/native-modules-android
Conclusion
In this blog, we explored the process of creating a native module for Android to implement native calling functionality in a React Native application. We discussed the necessary steps, including initializing the native module, implementing the native calling logic, registering the module, and accessing it from JavaScript. By following these steps, you can extend React Native’s capabilities to incorporate platform-specific functionality seamlessly.
Remember to thoroughly test your native module and handle any edge cases or error scenarios. Additionally, this blog focused on Android-specific implementation. If you need to support iOS as well, you’ll need to create a separate native module for iOS using Swift or Objective-C.
Creating native modules allows you to bridge the gap between React Native and native platform functionality, giving you the flexibility to build powerful, cross-platform applications with ease. Happy coding!